Leica Eyepiece: Full Introduction, Disassembly, Assembly & Maintenance
1. Product Overview
This eyepiece is an original factory component for Leica FlexLine TS02, TS06, TS09 and BUILDER X00 total stations. Our genuine & OEM replacement eyepiece for Leica total station is engineered for professional surveying and construction applications. Priced from $52 to $135. It serves as a core optical part of the telescope system, designed for field surveying, construction layout, target observation and other surveying tasks. It performs key functions including reticle alignment, field observation and diopter adjustment. It serves as a perfect replacement for worn, scratched, damaged or misaligned original eyepieces, delivering clear optical performance to guarantee accurate angle measurement, stakeout and topographic survey on harsh job sites.
Compatible with both Finefocus and Ergo focus telescope configurations of the above instrument series, this eyepiece features professional Leica optical design, outstanding imaging clarity, robust mechanical structure and excellent environmental resistance. As a frequently removed and replaced wearable part, mastering its structure, disassembly, assembly, adjustment and daily maintenance is essential to ensure the normal operation and long service life of the total station, in accordance with Leica’s official service specifications.
|
 |
2. Structural Composition & Core Components
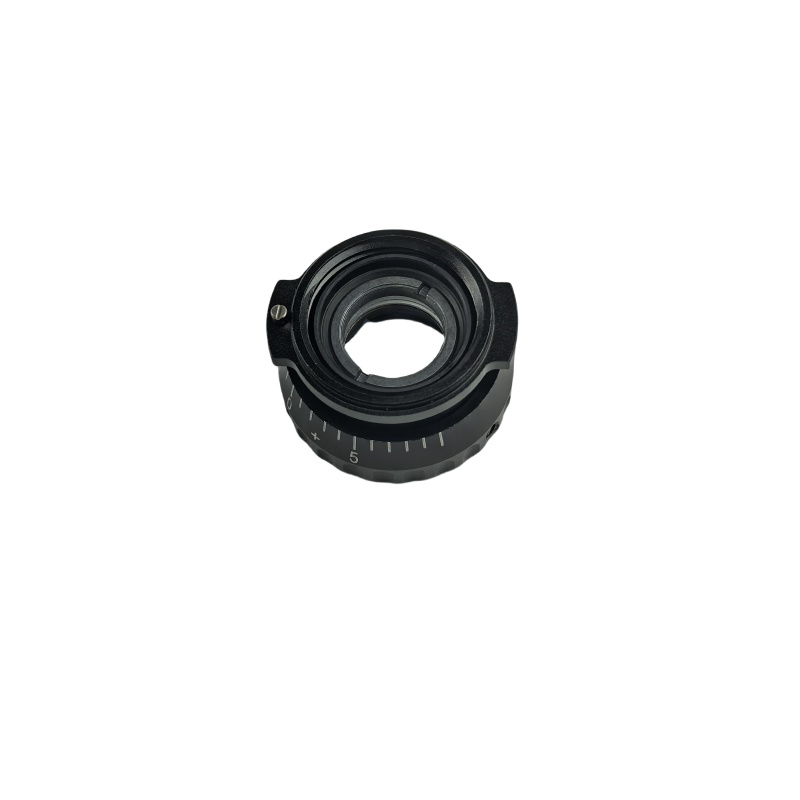
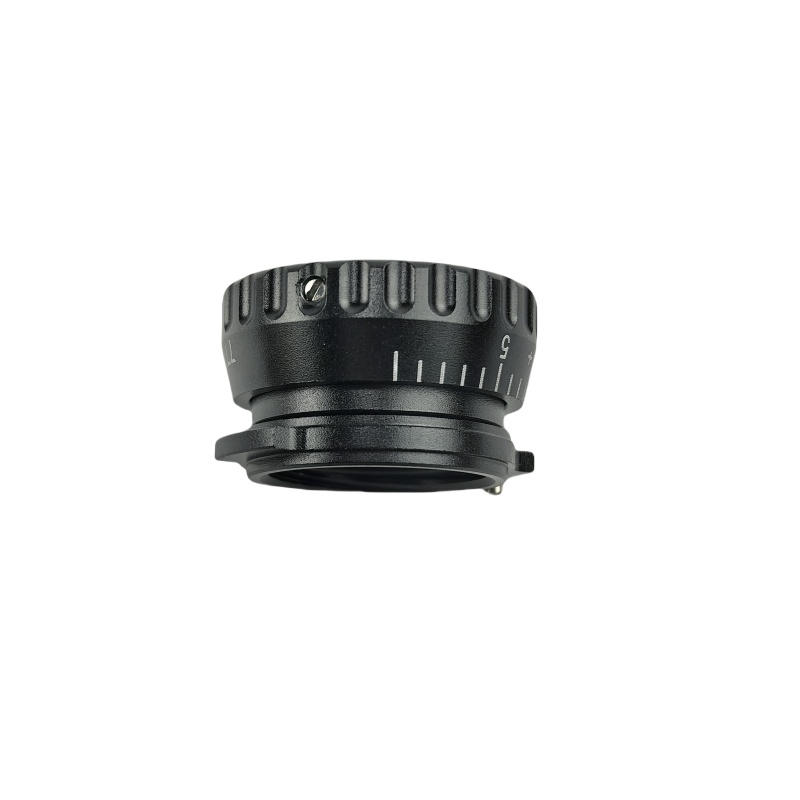
The complete eyepiece assembly consists of four major parts: optical components, mechanical fittings, sealing parts and auxiliary accessories. Each component has strict assembly tolerances, which directly affect observation quality and instrument protection.
2.1 Core Optical Components
- Objective Lens (Eyepiece Lens): The outermost lens close to the user’s eyes, fitted with an integrated reticle (crosshair). Made of high-transmittance optical glass with anti-scratch and anti-fog coatings, it acts as the fundamental reference for target collimation.
- Field Lens: Installed inside the eyepiece barrel. It works with the telescope objective to correct optical distortion and ensure uniform imaging across the entire field of view.
- Diopter Adjustment Ring: A rotatable outer structure for diopter compensation, adapting to myopia and hyperopia of different users to achieve clear imaging.
2.2 Mechanical Fittings
- Eyepiece Barrel: Main body made of lightweight high-hardness alloy. It provides stable support for optical lenses and serves as the connection base to the telescope tube.
- Set Screw: Model 161642 (M1.4×1.3 cylindrical set screw). It locks the eyepiece position to prevent loosening or rotation during use and transportation.
- Bayonet Structure: Standard bayonet connection for quick installation and removal between the eyepiece and telescope tube, with anti-loosening design.
2.3 Sealing & Auxiliary Accessories
- Sealing Gasket (O-Ring): Universal part No. 706530. It provides dustproof and waterproof performance, matching the instrument’s IP55 protection rating. Aged or damaged gaskets will allow dust and moisture to enter the optical system.
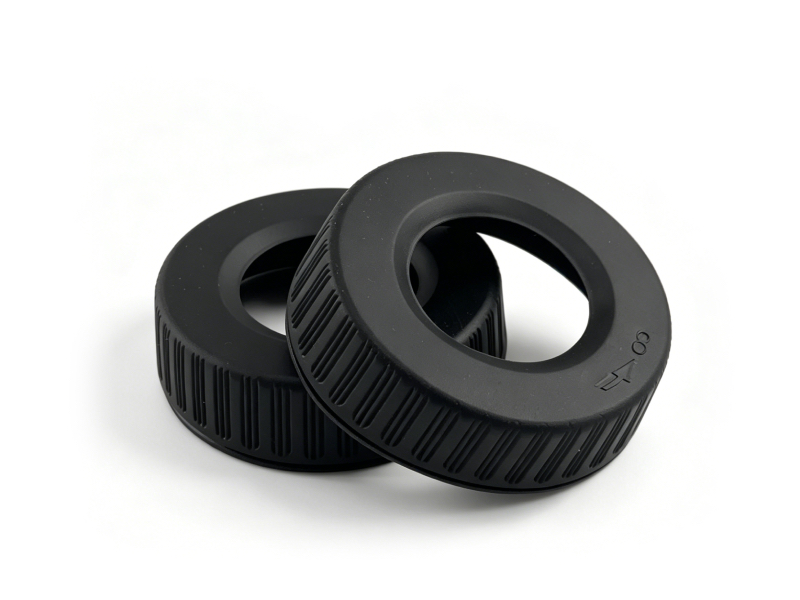
- Rubber Eyecup: Detachable flexible rubber accessory. It blocks ambient stray light, improves observation comfort and protects the lens edge.
- Limit Ring: Controls the screwing depth of the eyepiece to avoid excessive compression of internal optical elements and optical offset.
2.4 Environmental Resistance & Physical Parameters
- Operating Temperature: -20 °C ~ +50 °C (Arctic compatible: -35 °C ~ +50 °C)
- Storage Temperature: -40 °C ~ +80 °C
- Humidity Resistance: Up to 95% non-condensing humidity
- Single Net Weight: 0.12 kg (standard straight eyepiece) / 0.28 kg (diagonal eyepiece)
- Overall Size: 45 mm (diameter) × 62 mm (length) (standard type)
- Protection Performance: Dust-proof, splash-proof, lens anti-scratch coating
3. Compatible Instruments & Official Part Numbers
3.1 Applicable Instrument Models
- FlexLine Series: TS02, TS06, TS09 (including FlexLine plus upgraded versions)
- BUILDER Series: BUILDER 100, 200, 300, 400, 500 full-range total stations
- Compatible Telescopes: Finefocus standard telescope, Ergofocus comfort-focus telescope (the eyepieces of the two structures are interchangeable).
3.2 Official Spare Part Numbers (For Replacement & Procurement)
| Component Name | Part Number | Specifications & Remarks |
|---|---|---|
| Complete Eyepiece Assembly (Lens + Barrel + Eyecup) | 793978 | Exclusive for Leica TS02 |
| Complete Eyepiece Assembly (Lens + Barrel + Eyecup) | 793979 | For TS06, TS09 and BUILDER X00 series |
| Eyepiece Set Screw | 161642 | M1.4×1.3 cylindrical set screw |
| Universal Sealing Gasket | 70653 | Shared by eyepiece and keyboard sealing parts |
| Diagonal Eyepiece (Optional Accessory) | GFZ3 | For special scenarios such as high-altitude and underground observation |
4. Pre-operation Requirements (Critical Rules)
- Environment: All disassembly and assembly work must be carried out in a clean, dust-free and dry indoor space. No operation in outdoor dusty, humid or windy environments.
- ESD Protection: Strictly follow ESD (Electrostatic Discharge) protection regulations. Wear an anti-static wristband to prevent static damage to nearby electronic components of the instrument.
- Power Off: Turn off the total station power, remove the battery and all external cables before any operation.
- Tools: Use dedicated miniature hex wrenches and optical maintenance tools. Do not use ordinary screwdrivers or prying tools to avoid scratching parts.
- Parts Management: Place removed small parts (screws, gaskets, limit rings) on a lint-free soft cloth to prevent loss or contamination.
5. Standard Disassembly Procedures
- Remove the outer rubber eyecup and place it on a dust-free soft cloth for safekeeping.
- Locate the set screw (161642) on the side of the eyepiece barrel. Use a matched miniature hex wrench to loosen it counterclockwise (no need to remove it completely).
- Hold the main body of the eyepiece barrel and rotate it counterclockwise evenly to unscrew the eyepiece from the telescope bayonet. If the bayonet is stuck, shake the barrel slightly while rotating; do not apply brute force or prying.
- After taking out the eyepiece, remove the limit ring and sealing gasket in sequence. Inspect the appearance of the gasket for aging, cracks or deformation.
- For deep maintenance: If the internal lens needs to be disassembled, use professional optical tools only. Ordinary maintenance is not recommended to split the factory-bonded lens group.
6. Standard Assembly Procedures
- Clean all accessories: Wipe the lens surface, eyepiece barrel inner wall, limit ring and sealing gasket with dedicated Leica optical cleaning paper to remove fingerprints, dust and stains.
- Reinstall accessories in order: Fit the sealing gasket completely into the clamping groove, then install the limit ring, and confirm no offset or warping.
- Align the bayonet of the eyepiece with the telescope tube, rotate clockwise evenly to tighten the eyepiece until it reaches the limit position.
- Align the set screw, tighten it clockwise with a hex wrench to fix the eyepiece position.
- Reinstall the rubber eyecup, check its fit and make sure it is firm without loosening.
- Post-assembly inspection: Rotate the diopter ring to test flexibility, and observe the reticle to confirm no ghosting, blurring or offset.
7. Diopter Adjustment & Optical Calibration
7.1 Daily Diopter Adjustment
- Aim the telescope at a distant clear target (more than 50 meters away).
- Rotate the diopter adjustment ring slowly until the crosshair reticle inside the eyepiece is completely clear.
- Fine-tune again after observing for 2–3 seconds to eliminate visual fatigue errors. Different users need to re-adjust the diopter.
7.2 Post-maintenance Optical Calibration
After eyepiece replacement or overall disassembly and assembly, perform collimation inspection as required by the official service manual:
- Aim the instrument at a collimator or standard target, switch between Face I and Face II of the telescope.
- Check the horizontal offset of the crosshair. The lateral deviation shall not exceed twice the thickness of the reticle line.
- If the deviation exceeds the tolerance, recheck the eyepiece installation position and bayonet fit; if the problem persists, send it to an official authorized service center for professional calibration.
8. Daily Maintenance & Troubleshooting
8.1 Routine Maintenance Rules
- Cleaning: Clean the lens only with professional optical paper or lint-free cloth. Never use alcohol, chemical solvents, wet rags or ordinary paper towels, which will damage the anti-reflection and anti-fog coatings.
- Sealing Inspection: Check the sealing gasket every 3 months. Replace it immediately if aging, hardening or cracking is found to prevent water and dust ingress.
- Storage: When the eyepiece is removed for long-term storage, place it in a dedicated optical box with desiccant, and store it in a dry and cool place, avoiding high temperature, humidity and direct sunlight.
- Anti-collision: The optical lens is fragile. Avoid collision, drop and extrusion during use and carrying.
8.2 Common Faults & Solutions
| Fault Phenomenon | Possible Causes | Solutions |
|---|---|---|
| Blurred reticle, cannot be focused | 1. Lens stained with dust/fingerprints
2. Diopter not adjusted properly 3. Lens loose |
1. Clean the lens with optical paper
2. Re-adjust diopter 3. Reassemble and fasten the eyepiece |
| Eyepiece loosens and rotates freely | Loosened set screw (161642) | Retighten the set screw with a hex wrench |
| Water mist inside the lens | Damaged/aged sealing gasket | Replace the new gasket, clean the internal water mist and re-assemble |
| Stray light affects observation | Damaged or misplaced rubber eyecup | Reinstall or replace the rubber eyecup |
| Obvious crosshair offset | Eyepiece bayonet misaligned or telescope mechanical offset | Re-install the eyepiece; send for professional calibration if the fault remains |
9. Important Safety & Service Notes
- All disassembly and maintenance involving optical components shall comply with Leica’s official service specifications. Unauthorized disassembly of the lens group will void the instrument warranty.
- Discarded old gaskets and damaged accessories shall be disposed of in accordance with local environmental regulations.
- If the lens is cracked, chipped or the optical path is severely offset, stop using the instrument immediately and contact Leica official authorized service centers for replacement and repair.
- When replacing bulk spare parts, please refer to the official part numbers to ensure compatibility with the instrument model.